If you are getting ready to list your home, caulking your baseboards is probably not at the top of your to-do list. But it should be somewhere on it. Buyers and their inspectors notice finish details, and cracked, peeling, or missing caulk is one of those small things that adds up to a bigger impression of how well the home has been maintained.
The good news is that this is one of the easier items to knock out before you list. Here is what sellers in the Olympia, Lacey, and Tacoma area should know about baseboard caulking, how to do it right, and when it actually matters.
Do You Need to Caulk Baseboards?
Yes, and most homes need it more than homeowners realize. Baseboards run along the base of your interior walls, and over time, the gap between the baseboard and the wall, and between the baseboard and the floor, opens up as wood expands and contracts.
The original caulk dries out, shrinks, and cracks. What is left looks worn, and in wet areas, it can allow moisture behind the trim.
Caulking fills those gaps, creates a clean finished line, and helps protect the surfaces underneath. For a home going on the market, it is a low-cost improvement that makes each room look sharper and better maintained.

What Inspectors Notice About Baseboards
Home inspectors look at the overall condition of interior finishes as a signal of how the home has been cared for. Cracked or missing caulk can show up in an inspection report as deferred maintenance, even when it is a quick fix.
More importantly, inspectors pay close attention to baseboards in wet areas. In bathrooms, laundry rooms, and kitchens, failed caulk can allow moisture behind the trim and into the drywall or subfloor.
In the Pacific Northwest, where homes in Olympia, Lacey, and surrounding communities deal with consistent rain and elevated humidity, this is not just cosmetic. It is a moisture management issue that can lead to more significant findings.
Addressing it before you list means you control the timeline and the cost.
Where to Prioritize Caulking
Not every baseboard in the house needs the same level of attention. Start here:
- Bathrooms and laundry rooms. Highest priority. Inspectors look here closely, and failed caulk is most likely to have caused real damage underneath.
- Kitchen. Similar moisture exposure, especially near the sink. Worth checking and touching up before listing.
- Entryways and main living areas. Primarily cosmetic, but visible cracks and gaps in high-traffic areas affect how buyers perceive the home on their first walkthrough.
One important rule: do not apply new caulk over old caulk.
Remove it completely first. Caulking over failing material creates an uneven line that looks worse and does not adhere properly.
Choosing the Right Caulk
For most interior baseboards, a paintable latex acrylic caulk is the right choice. It applies smoothly, can be painted to match your wall color or trim, and is flexible enough to handle normal wood movement without cracking quickly.
For wet areas like bathrooms and laundry rooms, use a siliconized acrylic caulk with mildew resistance. Avoid silicone-based caulk on baseboards. It does not accept paint well and is difficult to apply cleanly, making it a poor choice for trim work, even though it works well around a tub or tile.
| Location | Caulk Type | Paintable |
| Living areas, hallways | Paintable latex acrylic | Yes |
| Bathrooms, laundry | Siliconized acrylic, mildew-resistant | Yes |
| Kitchen | Siliconized acrylic | Yes |
| Around the tub or tile | 100% silicone | No |
How to Caulk Baseboards Step by Step
This is a manageable DIY project for most homeowners. Prep work is where most people go wrong, so take the time to do it right.
1. Remove old caulk completely. Use a putty knife or utility knife to cut away existing caulk along the joint. Clean the surface with warm water and let it dry fully. Use a vacuum to pull dust and debris out of the gap before applying anything new.
2. Tape off the area. Apply painter’s tape along the wall above the baseboard and along the floor below. This protects both surfaces and gives you a clean caulk line when the tape comes off.
3. Cut the caulk tube at a 45-degree angle. Start with a smaller opening than you think you need. A thin bead is easier to control and smoother than a thick one. You can always add more, but excess caulk is messy to clean up.
4. Apply caulk in sections of 3 to 4 feet. Work in manageable sections so you can smooth the bead before it skins over. Use a dripless caulking gun for better control.
5. Smooth the bead immediately. Run a wet finger or damp sponge along the caulk line right after application. Wipe excess caulk onto a damp cloth as you go.
6. Pull the painter’s tape while the caulk is still wet. Remove tape at a 45-degree angle before the caulk dries. Waiting until it cures can pull the caulk away with it.
7. Paint once fully cured. Check the caulk label for cure time. Most latex acrylic caulk is ready to paint within a few hours.

Maintaining Caulked Baseboards
Once the job is done, upkeep is simple. Wipe baseboards regularly with a damp cloth to remove dust and dirt that accumulates along the base of the wall. If you notice new cracks or gaps forming later, remove the old caulk completely before applying new caulk. A proper seal requires clean, dry surfaces.
Other Pre-Listing Details Worth Checking
While working along the baseboards, check a few nearby areas that also tend to show up on inspection reports. Look at door thresholds and transition strips to make sure they are sitting flush.
Check the shoe molding at the base of any flooring for gaps at the corners or miter joints. In bathrooms, inspect the caulk around the tub and shower surround, which is one of the more common items inspectors flag for moisture concerns.
Questions Sellers Often Ask
Does caulking baseboards help during a home inspection? During a home inspection, it removes an easy call-out and contributes to the impression of a well-maintained home. Buyers notice finished details, and a home that shows well tends to attract stronger offers with less post-inspection negotiation.
What if there is damage behind the old caulk? If you find soft drywall, staining, or discoloration after removing old caulk, do not cover it back up. That is a sign of moisture intrusion that needs to be assessed. Boggs offers mold and indoor air quality testing for situations where moisture may have caused issues behind walls or under floors.
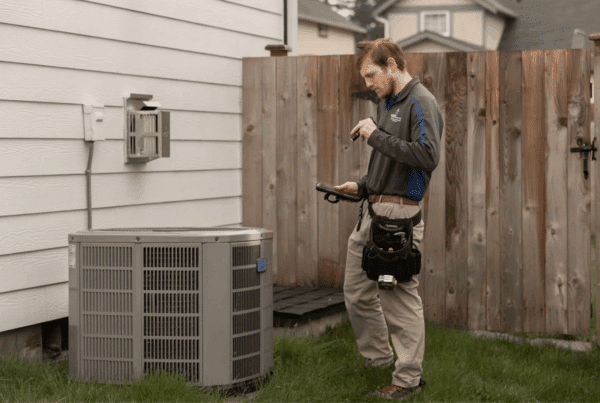
Should I get a pre-listing inspection even for a newer home? Yes. Even newer homes have items that come up in buyer inspections, and knowing what those are before buyers are involved puts you in a much stronger position. Boggs offers pre-listing inspections throughout Washington, along with annual maintenance inspections for homeowners who want to stay ahead of issues year-round.
When to Call a Professional
Caulking baseboards is something most sellers can handle on their own. Where professional help makes sense is when the damage goes beyond the caulk itself.
If you find soft drywall behind the trim, musty odors near the baseboards, or any signs of water intrusion in a bathroom or laundry room, those are worth investigating before you list.
Boggs Inspection Services can assess whether moisture has caused damage beyond what is visible, including mold testing and sewer scope inspections for homes with older plumbing
Conclusion
Caulking your baseboards before selling is a small investment of time that pays off in how your home shows and how smoothly the inspection process goes. It is one of the easiest items on the pre-listing checklist and one of the most overlooked.
If you want the full picture of your home’s condition before you list, schedule a pre-listing inspection with Boggs Inspection Services. We will walk through the home the way a buyer’s inspector would, so you go into the listing period informed and confident.